Instagram Reels for Your Business – Why You Need Reels, and How to Use Them

If you’re here, then you’ve probably heard of Instagram Reels. And if you haven’t, then you still landed on the right blog post. We’re about to give a great crash course on what they are, and how and why you should use them for your business.
Simply put, Instagram Reels is a brand new means to capture and share 15 and 30-second clips to Instagram. If this format seems somewhat familiar, it might be because it’s a lot like TikTok videos, or it could be due to all the videos you’re suddenly seeing in your Instagram feed. Yeah, there’s a reason for that. Instagram is prioritizing those Reels in people’s feeds, meaning you want to get in on all that reach. So, let’s get you to incorporate them into your marketing strategy! But first things first…
What are Instagram Reels?
Instagram Reels are presented as short videos (currently, Instagram offers 15 to 30 second time limits), usually edited in the Reels tab on Instagram. This tab provides users with audio and texts to use over the videos, as well as easy editing tools. Instagram Reels follow the TikTok format: trending music, text on videos, short and quick to grab attention. When users scroll their feeds — whether their regular Instagram feed or the Reels tab (more on the two later) — these videos autoplay, creating an experience that keeps users engaged.
How to Find Reels in Instagram
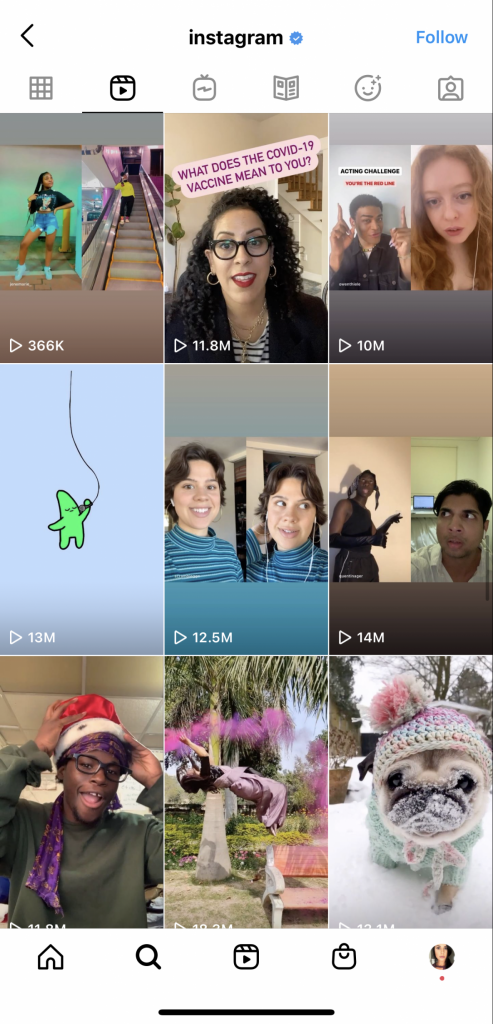
To locate the Reels tab in the instagram app, it’s at the bottom of the screen right in the middle of the main navigation bar. This was, of course, done intentionally so that users and creators feel more inclined to watch and create Reels. While browsing this tab, you will see videos from trending accounts on Instagram. Unlike your regular home feed, where the organic content you see is from users or hashtags you follow.
How to Create Reels that will Reach a Wide Audience
The Reels algorithm is a bit of a mystery, however there are some things we do know.
Don’t repurpose content from other apps. Instagram quickly caught on to users reposting their TikTok content to Reels when the feature was first introduced. So, Instagram started penalizing watermarked videos. Here is what Instagram had to say about it:
“We’ve heard that low video quality reels (i.e.blurry due to low resolution) or content that is visibly recycled from other apps (i.e. contains logos or watermarks) makes the Reels experience less satisfying.
So, we’re making this content less discoverable in places like the Reels tab.”
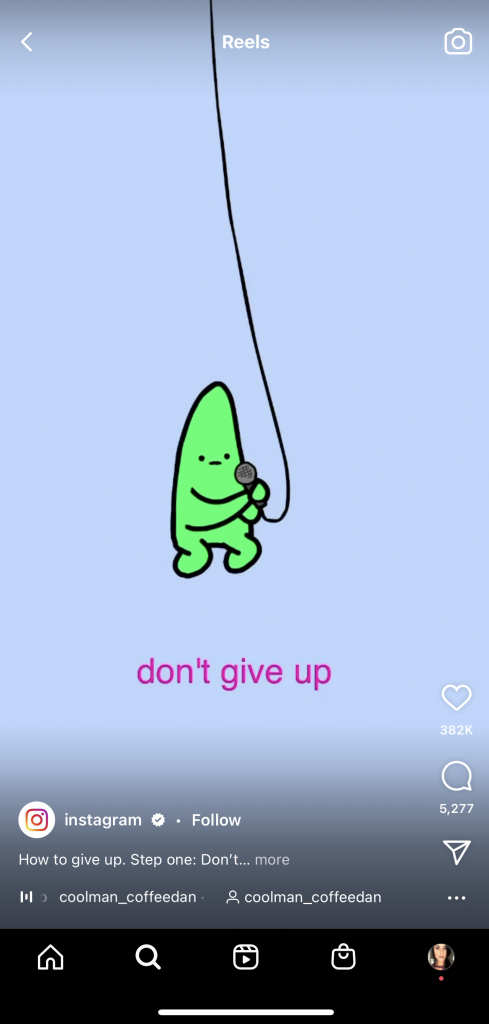
Less Text is more. In an effort to keep the Reels experience short, immersive and easy-to-digest, Instagram announced that Reels with heavy text over videos will not be prioritized in the algorithm.
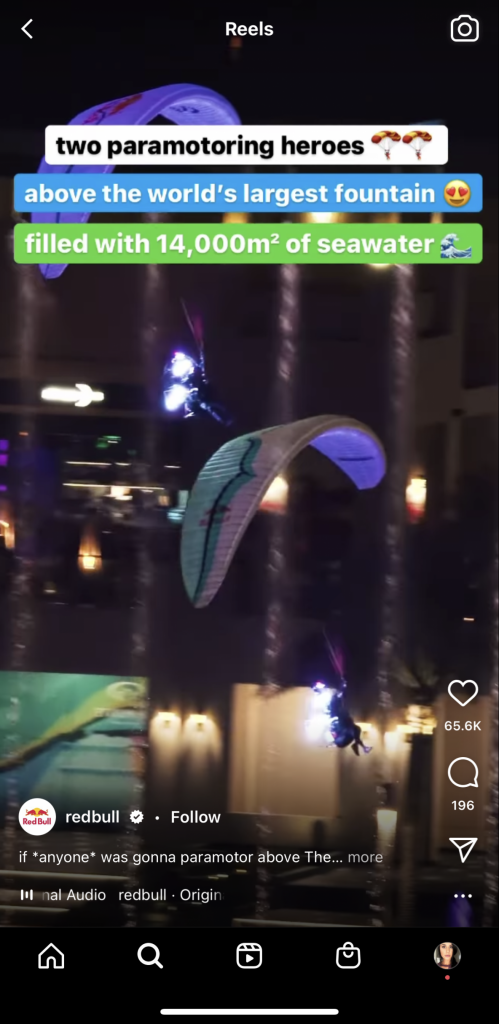
Do create funny, lighthearted, entertaining videos. Humor and entertainment is prioritized. And if you’re thinking “there’s no way my business-related content will perform against funny videos,” think again. You can present your videos in a way that follows current trends, dances, music, etc.
And trends can be something as simple as audio used on Reels! Similar to TikTok, you’re able to save another video’s sound and use it on your own video. When a lot of users do this, the sound becomes a “trend.” One thing we love about Reels and Instagram is that you’re not left hanging when coming up with new content. In fact, the algorithm rewards you if you feel inspired to hop on a trend.
One thing to note about audio: the Instagram Reels music attribute does not work for business accounts. So, we suggest switching your account to the “Creator” category instead. Heads up if you use a scheduling platform: Any posts you have scheduled for Instagram will have to be reposted when you switch your account category. Alternatively, you can edit the music over your video (or simple record it with sound) outside of the Instagram app.
Whatever you do, we suggest that you spend some time scrolling through Reels on Instagram first. This will help you familiarize yourself with the trends and best practices. Here’s how to access them.
Where and How to Watch Instagram Reels?
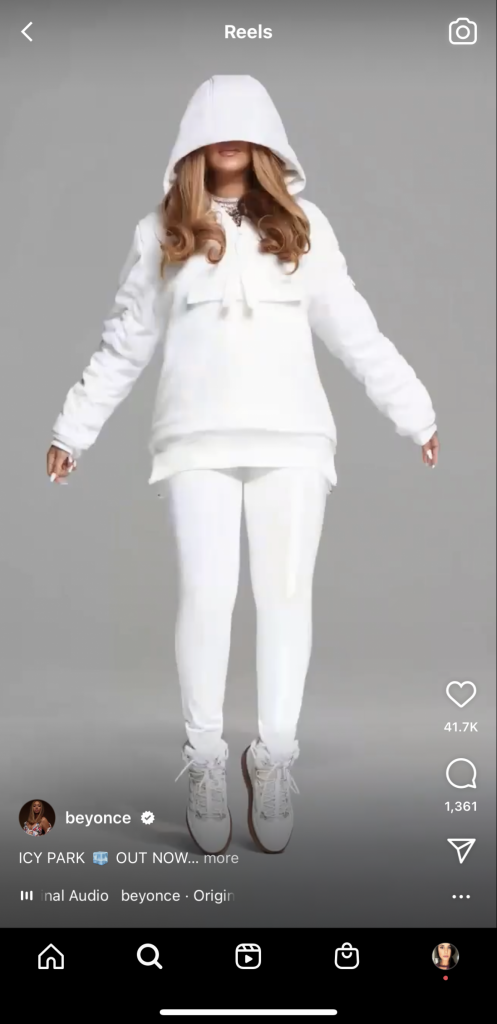
While in the Instagram app, navigate to the Reels button right in the middle of the main navigation. Your first Reel should be visible to you!
You can easily scroll through Reels, and each video will auto-play for you. If you see a video that inspires you to create something similar, be sure to bookmark it. Click on the 3 buttons on the button right, then click “save.” That way, you can revisit your saved Reels when creating your own. This also helps because you’re able to click on the audio in the bottom left, and use it on your own Reel!
If you’re wondering what a specific user is posting via Reels, here’s how you can see. Visit their Instagram profile, and the icon will show up directly above their grid. Clicking on this will display all of their active Reels. If an account doesn’t have published Reels, you will not see this icon on their profile.
You may also view Reels from accounts you follow in your own feed.
How to Create Instagram Reels
So, you’re probably wondering how to post to Reels, or you found this blog while specifically searching for this. Don’t worry, we’re going to get down to every detail!
First, head to the Reels section of Instagram. From there, click the camera icon (top right of the screen), and you should now be in Create Mode.
You can also access Create Mode in the same way you post other media to Instagram. From your own grid, click on the plus sign (top right of the screen), then click on “Reel.”
From here, you can either film content while in Create Mode, or upload pre-recorded content from your phone. If you want to record a video while in the app, hold down the Reels button located in the center of the screen (like you would hold down a button while recording Stories).
If you’d like to upload a pre-recorded video from your phone, click the gallery icon at the bottom left of your screen, or simply swipe up. Depending on your video, you may want to trim it down. We cover how to do that below.

This is the stage in editing that allows you to add stickers and text. So, make sure to use any of these tools while you’re here. If you recorded the video within the app, there are editing features on the left side of the screen available to you. Unfortunately, if you’re using pre-recorded videos, adding music is the only feature from that left hand toolbar accessible to you.
How to Add Music to Your Instagram Reels
Remember, Business profiles have a limited music library. So, we suggest switching your profile to the “Creator” category if you’d like to have a bigger range of music options.
After you click the music icon, you’re able to browse through the music categories that Instagram has populated for you, or use the search bar if you’ve already got a song in mind. (Remember, trends!)
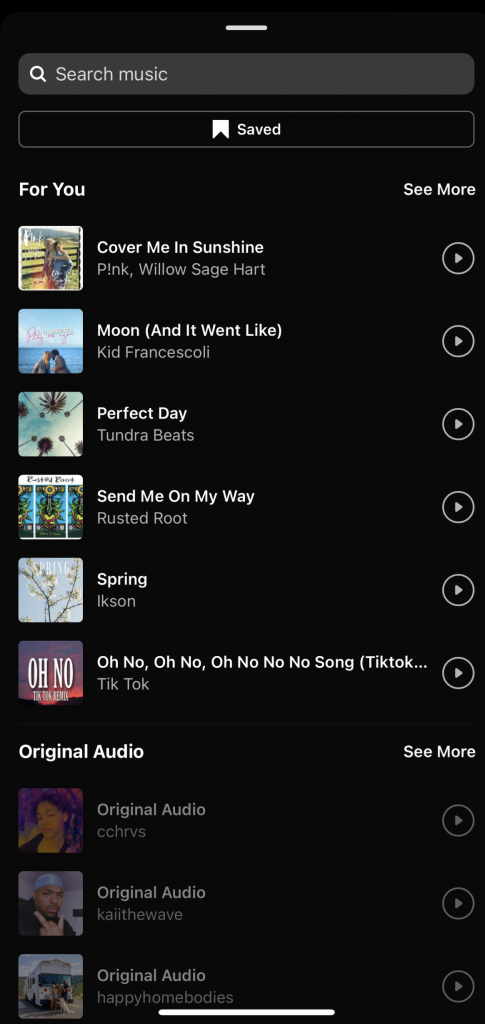
Once you’ve selected your song or audio, you may drag your finger along the audio trimmer at the bottom of your screen. Pay attention to the colored notches on the trimmer, that’s Instagram also guiding you to its recommendations on where to start audio.
How to Set a Time Limit on Your Instagram Reels Recording
This is a must-use tool if you’re recording your video within the app! This tool allows you to select how long your clip can be before recording, and a bar will pop up that displays how many seconds you have left for filming. You’re also able to adjust the clip before uploading!
Recording Multiple Clips In Instagram Reels
You want your upload to flow well together, even if you’re using multiple clips. This tool allows you to align your new video with the final frame of your previous clip. This tool is the very last option on the left side of your screen, so be sure to click that before recording your next clip!
Using Instagram Filters on Your Reels
On the left side of the screen, select the Smiley Face icon, pick the effect you want, and start recording.
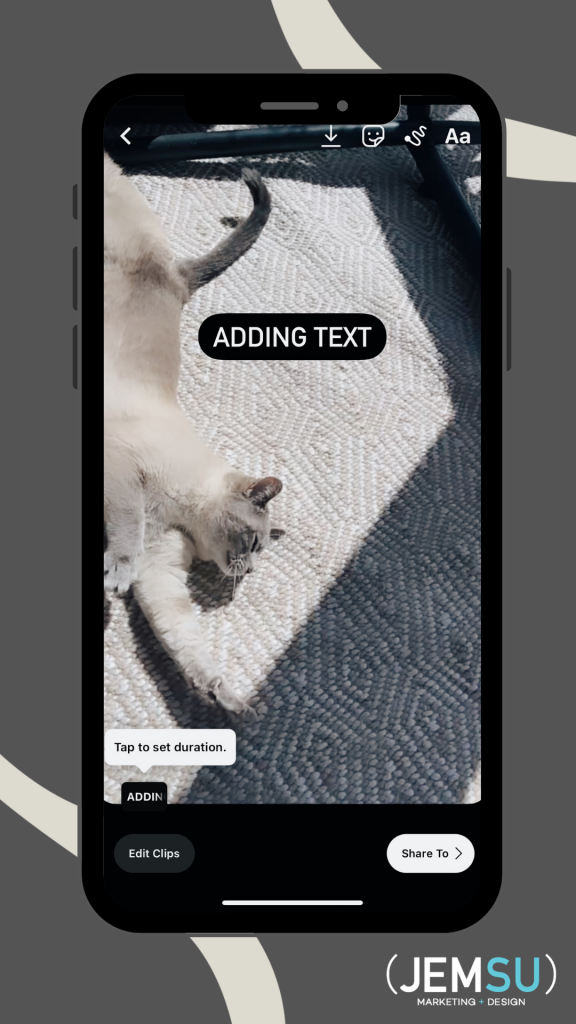
Adding Text to Your Instagram Reel
Don’t worry about when your text will display in your Reel right away. First, just type out all the text you want to display. Be sure they’re well within the frame, and keep things short. Remember, Reels are 15 to 30 seconds long, so you want to keep your text concise. Once you have your text typed out, click on it to adjust the duration on the timeline (when you want the text to appear and disappear in the video). It’s helpful to preview the full video as you adjust each text bubble; you want clean continuity between each text that is displayed!
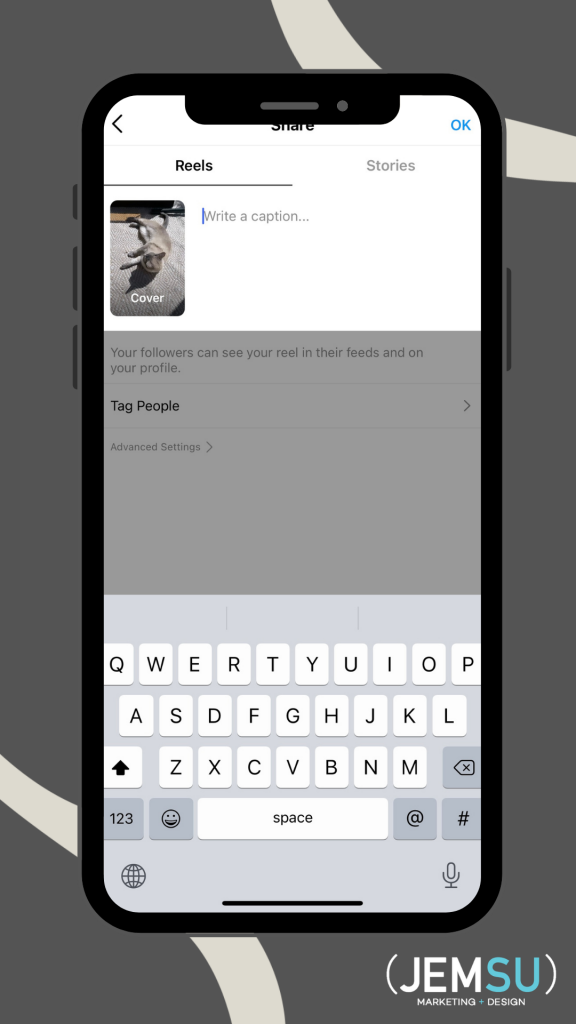
Publishing Your Instagram Reel
Once you’re done recording and editing your Reel, you’re ready for publishing! Don’t panic, clicking the right arrow besides the Reels recording button will not automatically publish your post — you have the chance to review it!
However, once you’re satisfied with your creation, click the right arrow at the bottom of your screen. Instagram will then prompt you to select a cover from the recording (or add your own from your media library). Make sure to choose one that you think would make users want to watch (if they’re ever visiting your grid.) And make the caption enticing, too! Perhaps the most important thing is adding relevant hashtags. This will help serve your Reel to an appropriate audience.
You also have the option of sharing your Reel to your Instagram Feed. Use the toggle to turn that option on or off.
Once your Instagram Reel is published, you can view it by navigating to the Reels tab in your profile.
Why Your Business Should be Using Instagram Reels
Reels are a guaranteed way to increase your reach! While they may seem informal, adding them to your content strategy is part of playing the Instagram algorithm game. Your Reels can be displayed to a wider audience, which increases your brand awareness and in turn, followers and engagement.
Reels are also a great way to position yourself as a thought leader, without having to stress about brainstorming how to do so. Again, imitation is encouraged in this space! And you don’t have to check out what a direct competitor is doing on Reels. Instead, get inspired by creators from other industries. Someone’s Reels about “Top 5 things to ask in an interview” could be your “Top 5 reasons to work with me,” using the same dance or song!
With the rise of TikTok, more personal and less picturesque content is what users are longing for. Reels provides you the chance to become more personable. By neglecting Reels, you may be passing up an opportunity to create real relationships with your brand and building (or further establishing) your community.
Not to mention, if you’re in the ecommerce industry, Instagram Reels are shoppable! Making them a great way to increase traffic and sales in your shop.
Jemsu Is a Denver Social Media Marketing Agency That Can Help with Instagram Reels
We’ve just provided you with a ton of information and guidance explaining how and why your brand should be utilizing Instagram Reels. However, if you do not have the time, or find this information a little more overwhelming than what you’re willing to take on, we can help. Our social media team has more than a decade of social media experience, and have been utilizing Reels for clients since their release. You may contact us here for a FREE consultation. One of our analysts will provide you with a detailed audit of your current social media profiles, and will customize a social media strategy for you — if they deem our partnership a good fit, of course.
For more marketing tips and tricks, check out the rest of our blog here.